RepairCore includes a web-based installer that guides you through the setup process.
Prerequisites
Before you begin, ensure you have met the System Requirements.
Installation Steps
1. Upload Files
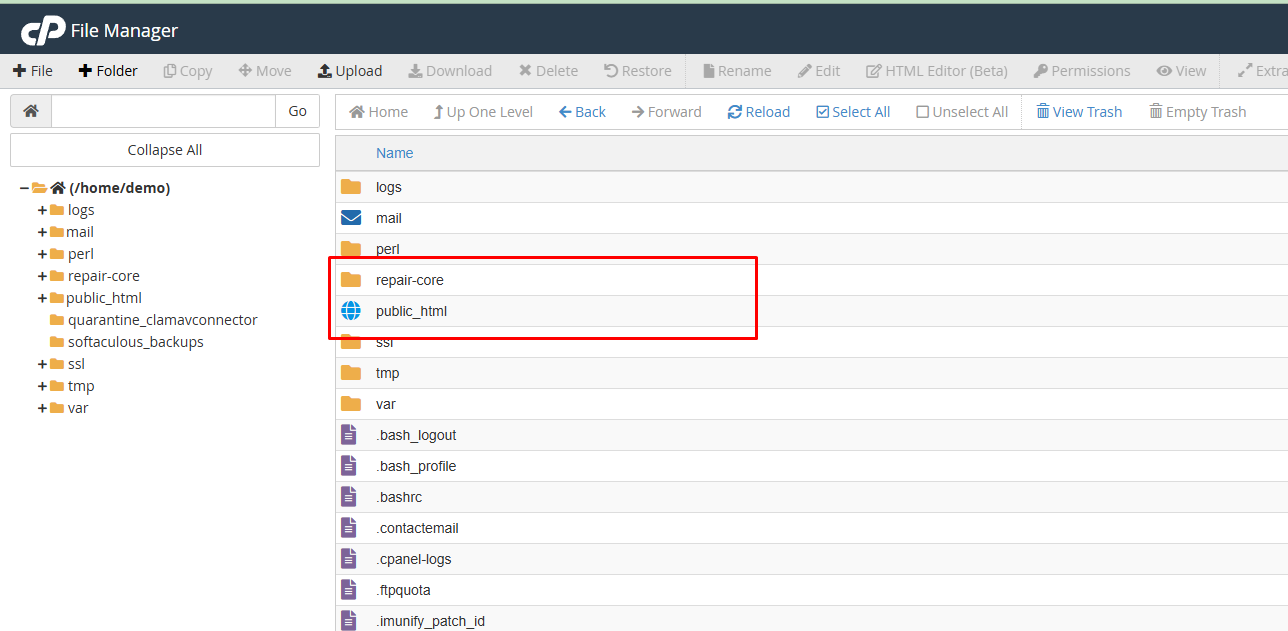
RepairCore uses a different folder structure than standard Laravel applications. Instead of having the public folder inside the application code, we separate public_html from repair-core for better security.
Why this structure?
Standard Laravel puts the public folder inside the application code. This means if you upload everything to public_html (as many cPanel users do), your application code becomes publicly accessible - a serious security risk.
Our structure keeps the application code (repair-core) outside the web-accessible directory, so only the public files are exposed.
For cPanel Users (Recommended)
Most cPanel hosting doesn't allow changing the document root. Upload files as follows:
/home/username/
├── repair-core/          ← Upload repair-core folder here (same level as public_html)
│   ├── app/
│   ├── config/
│   ├── database/
│   └── ...
└── public_html/          ← Upload contents of public_html INTO this folder
    ├── themes/
    ├── index.php
    └── ...
Steps:
- Upload the
repair-corefolder to your home directory (same level aspublic_html) - Upload the contents of the
public_htmlfolder into your existingpublic_htmlfolder
For SSH/VPS Users
If you have SSH access and can configure your web server's document root:
/var/www/yoursite/
├── repair-core/
│   ├── app/
│   ├── config/
│   └── ...
└── public_html/          ← Set this as document root in your web server config
    ├── themes/
    ├── index.php
    └── ...
Steps:
- Upload both
repair-coreandpublic_htmlfolders to your server - Configure your web server (Apache/Nginx) to set
public_htmlas the document root
Apache example (in virtual host config):
DocumentRoot /var/www/yoursite/public_html
Nginx example:
root /var/www/yoursite/public_html;
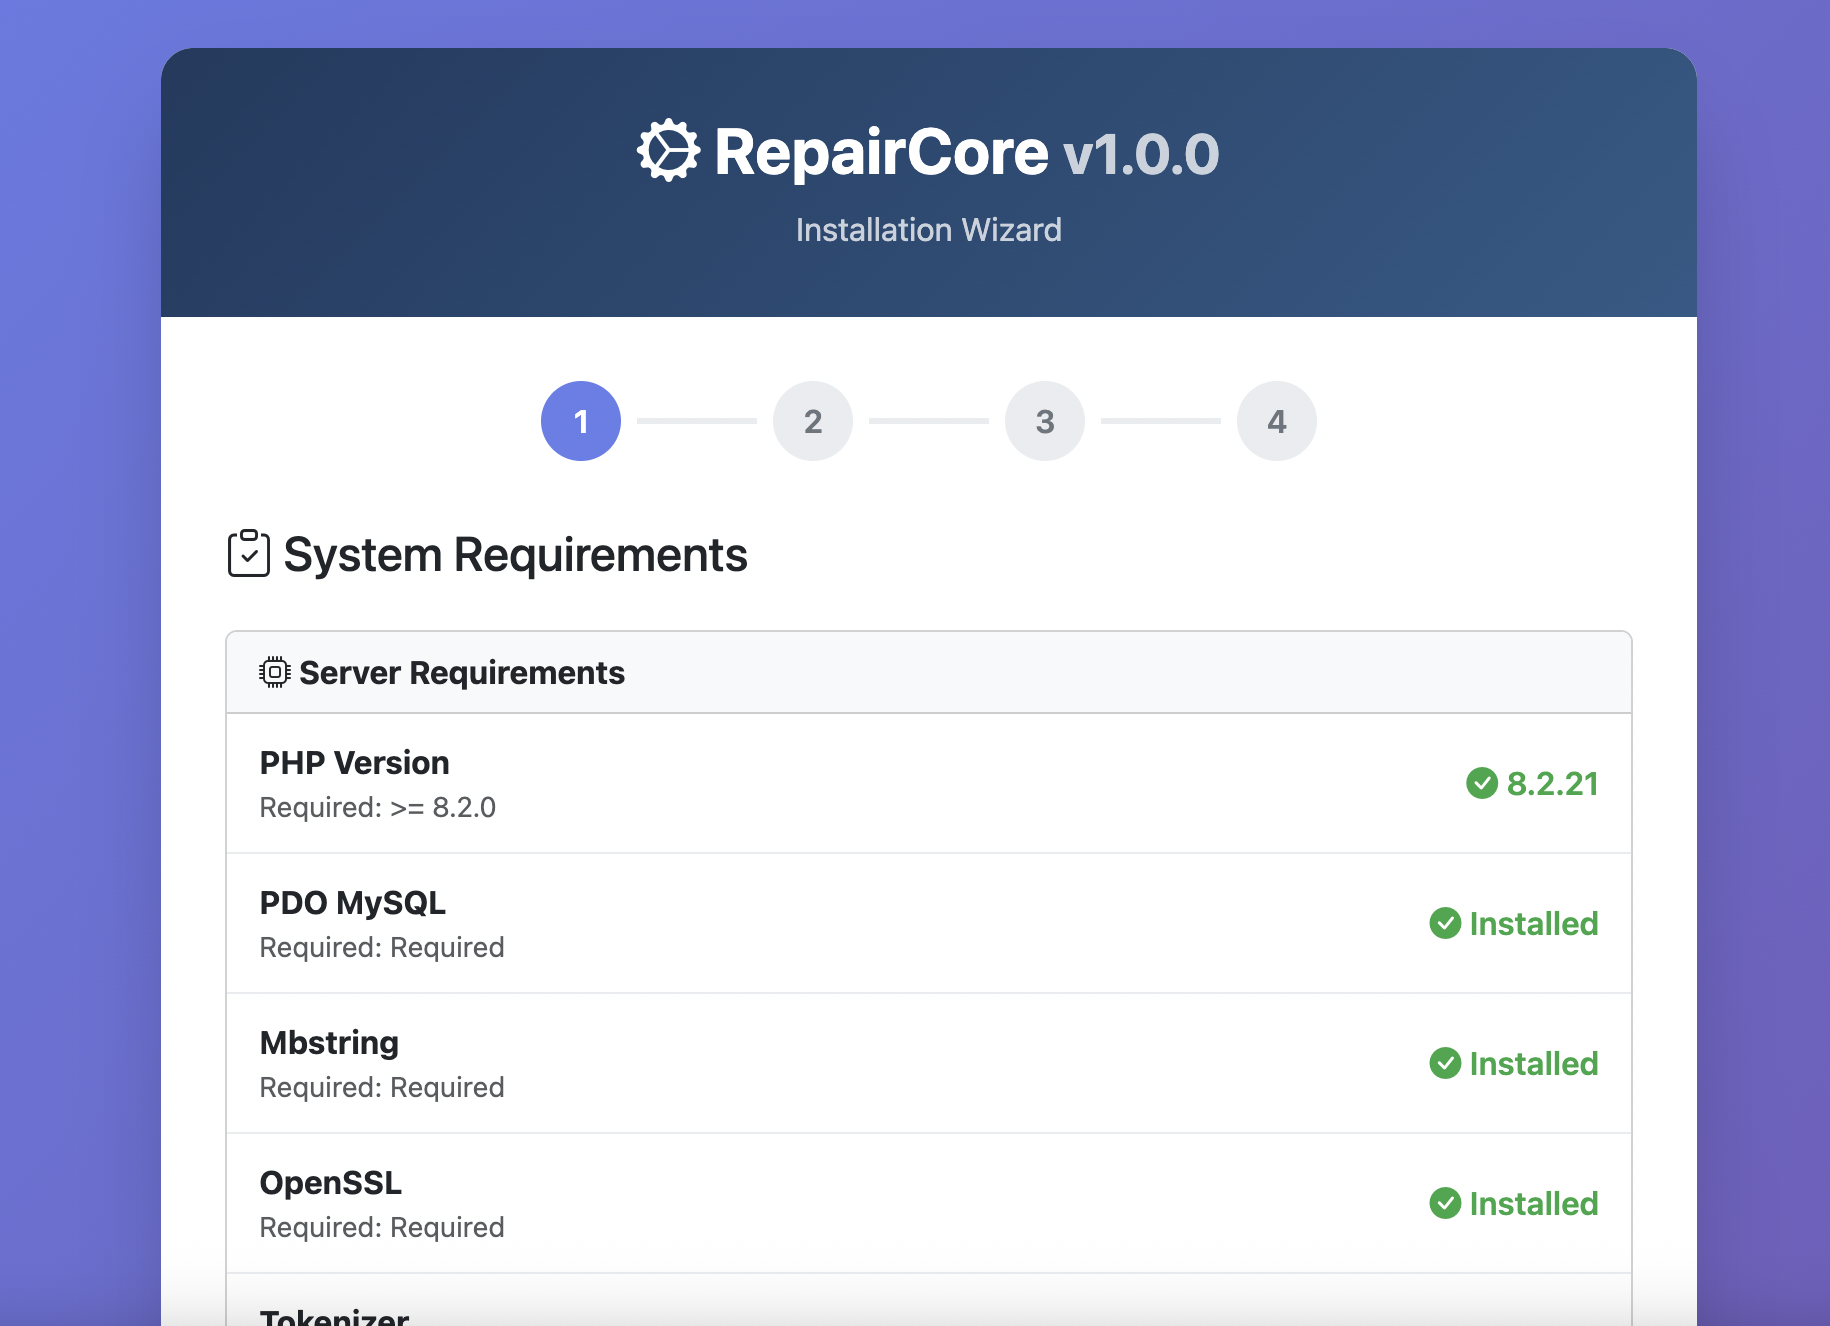
2. Access the Installer
Navigate to your domain in a web browser. The installer will automatically start.
3. System Check
The installer checks your server meets all requirements:
- PHP version and extensions
- Directory permissions
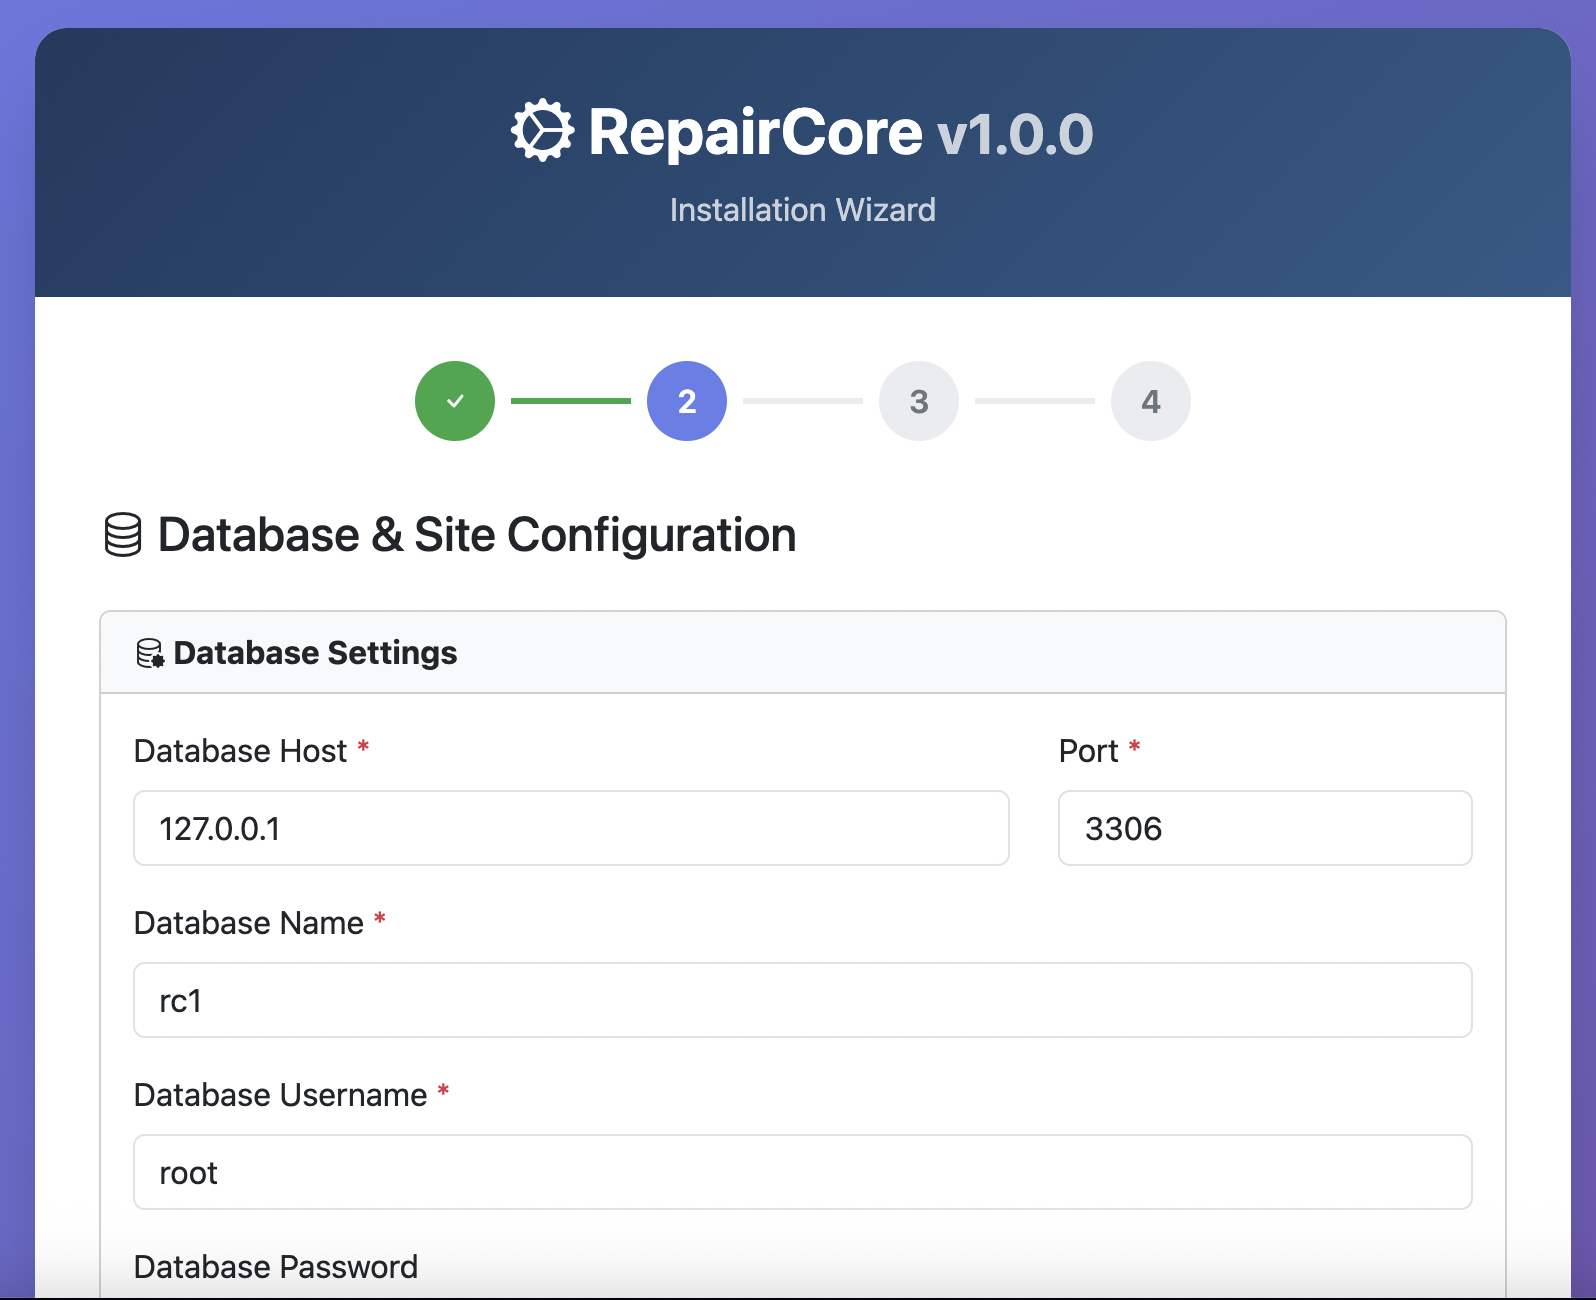
4. Database Configuration
Enter your database credentials:
- Database host
- Database name
- Database username
- Database password
Enter your Site Settings:
- Site Name
- Site URL
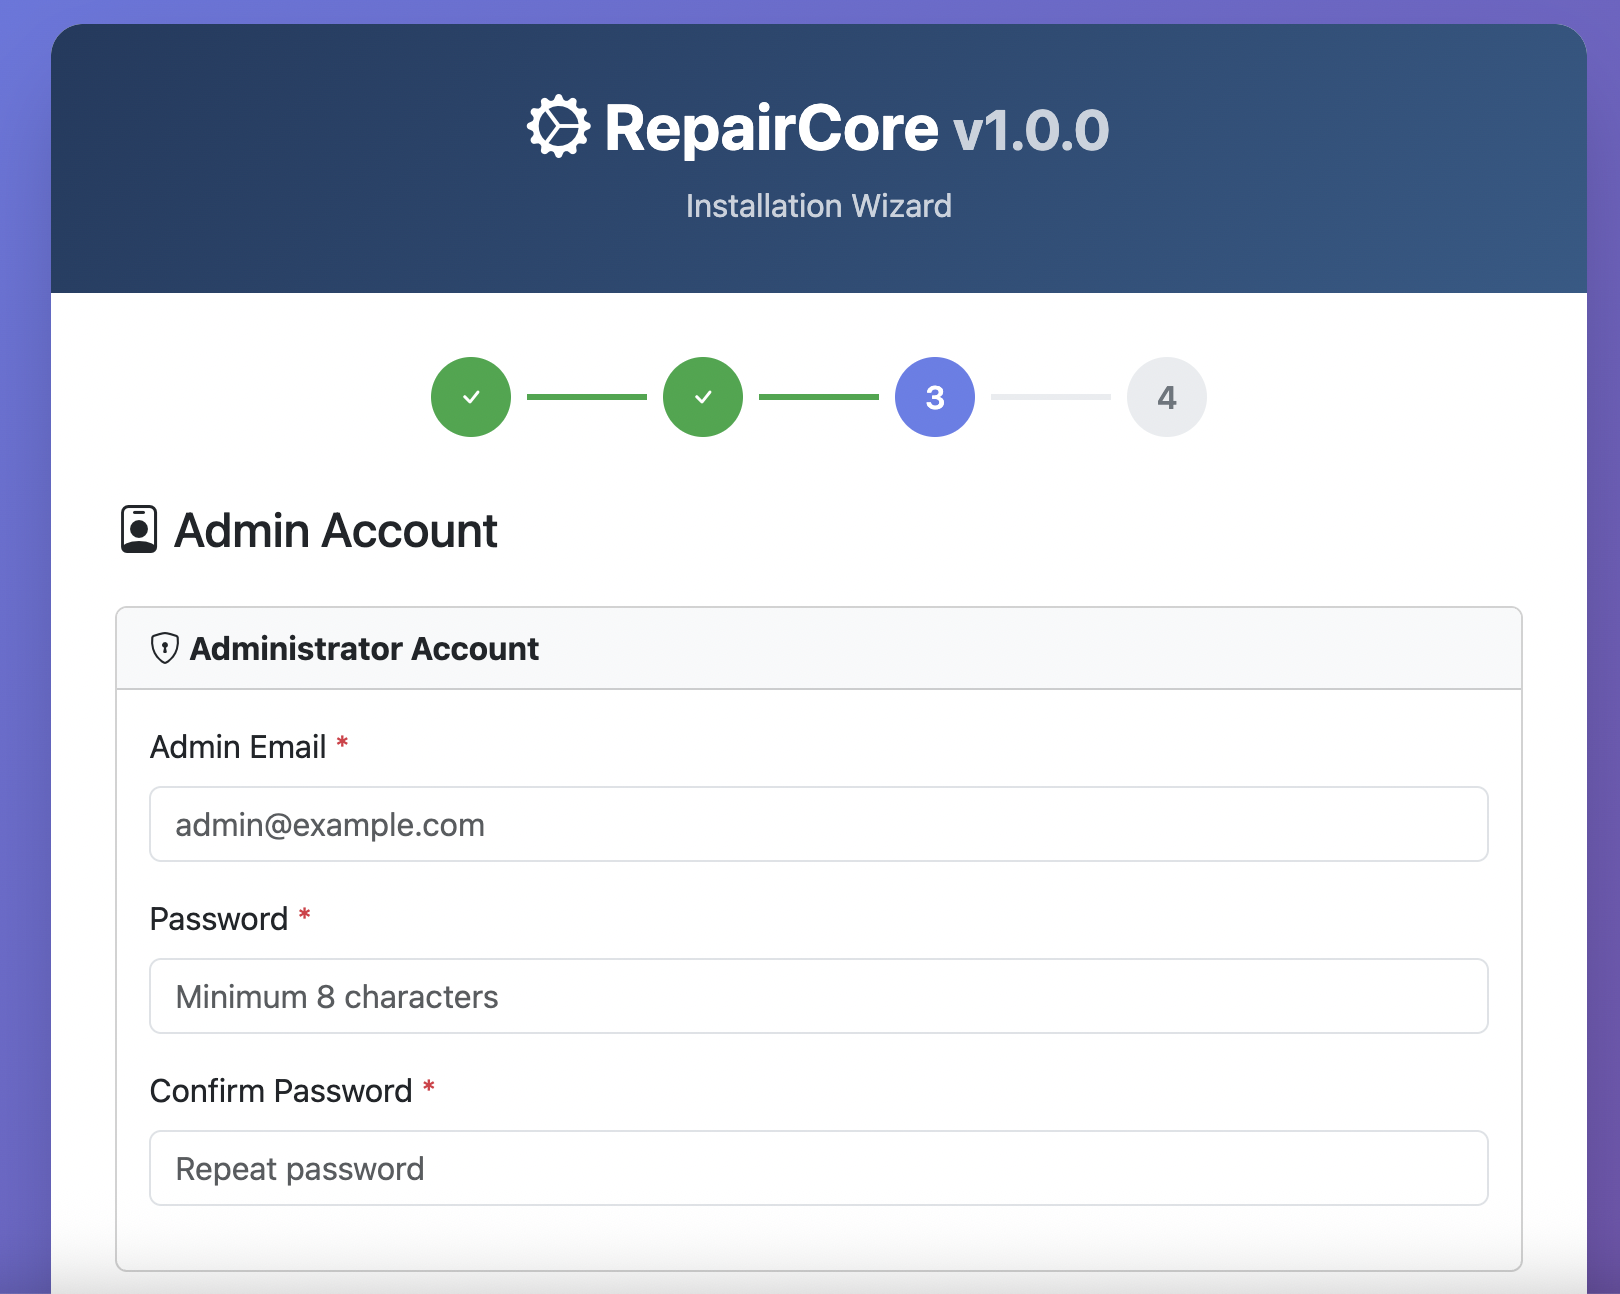
5. Admin Account
Create your administrator account:
- Email address
- Password
- Confirm Password
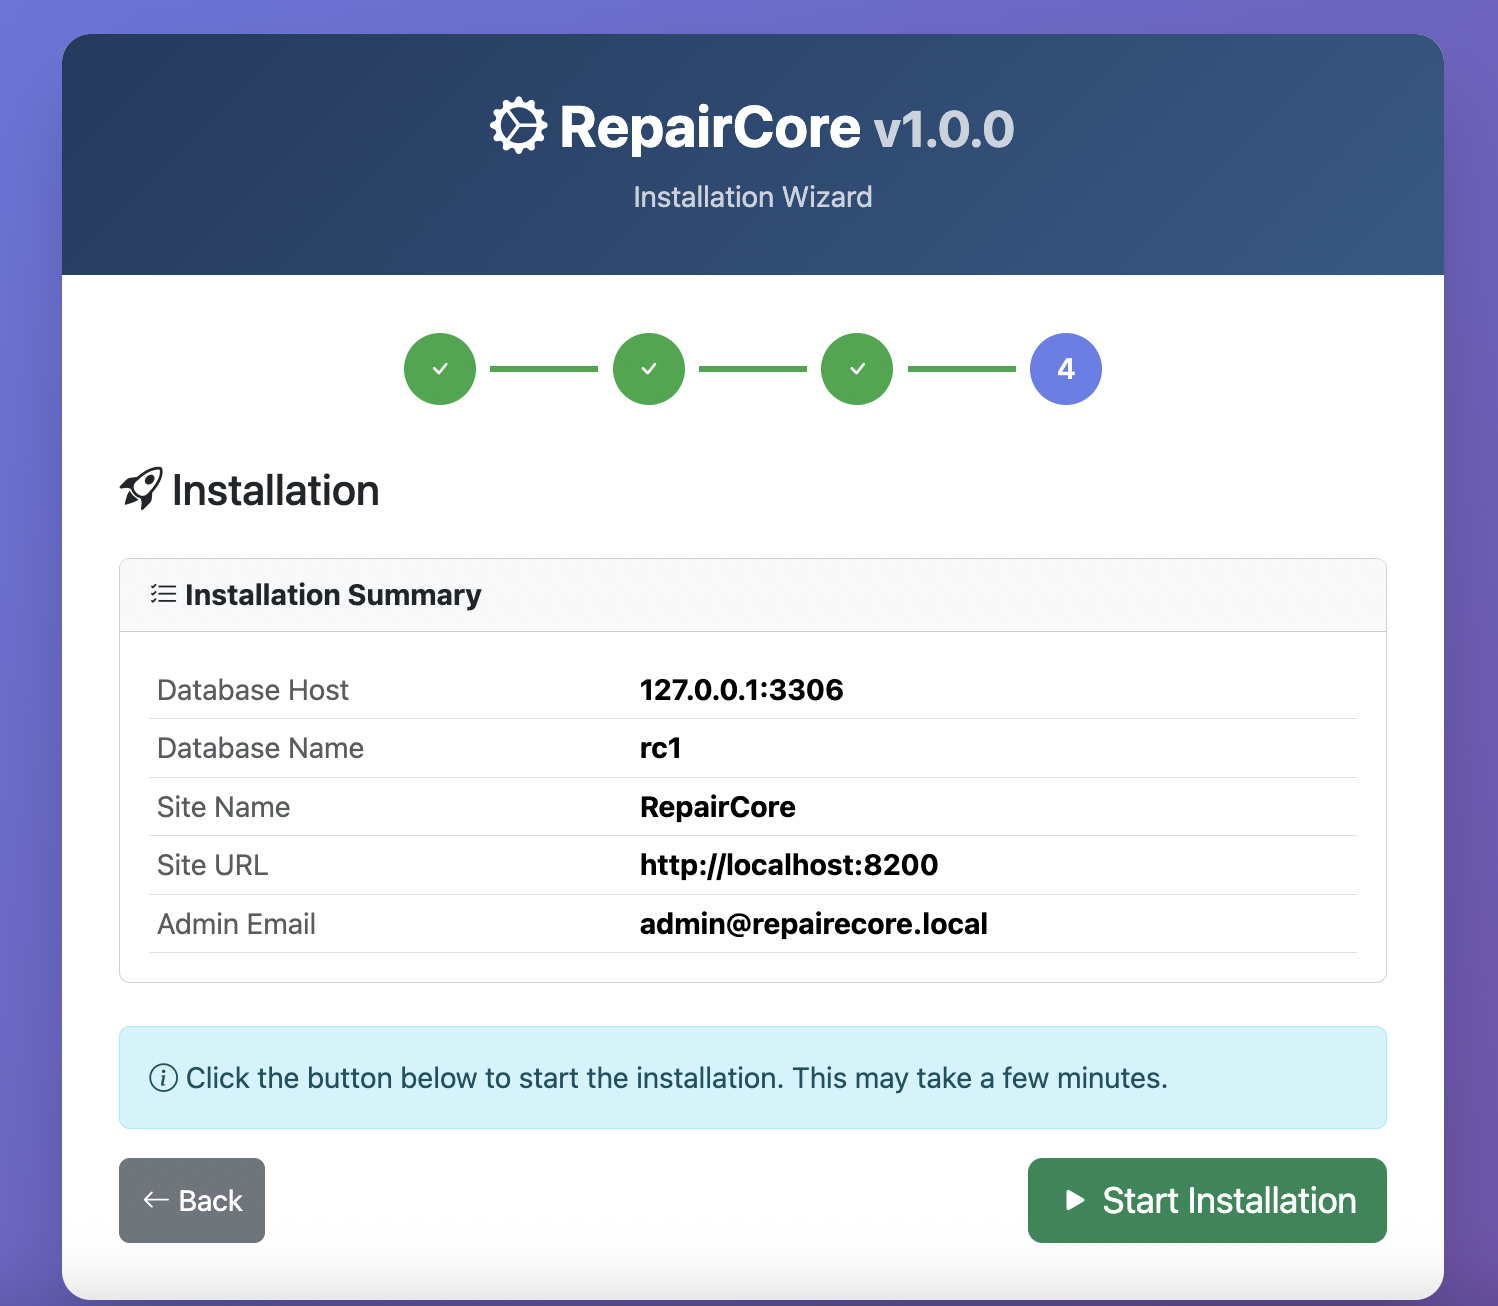
6. Complete Installation
Click Start Installation to complete the setup. The installer will:
- Create tables
- Set up default settings
- Create your admin account
- Seed demo data
7. Access Admin Panel
After installation, log in to the admin panel with your credentials.
Post-Installation
Review Settings
Check all settings pages to customize RepairCore for your business.
Troubleshooting
Installer Not Loading
- Check file permissions
- Verify web server configuration
- Check PHP version
Database Connection Failed
- Verify database credentials
- Ensure database server is running
- Check database user has proper permissions
Permission Errors
Ensure these directories are writable:
storage/bootstrap/cache/